-
Array
(
[0] => Array
(
[id] => 1
[siteid] => 1
[parentid] => 0
[parentstr] => 0,
[infotype] => 0
[classname] => Home
[navname] => Home
[alias] =>
[english] =>
[linkurl] => /
[relinkurl] => index.html
[picurl] =>
[picwidth] =>
[picheight] =>
[colorval] =>
[boldval] =>
[seotitle] => Automotive Lamp suppliers,Led Headlight solutions,Luz Led Para Moto price,Headli
[keywords] => Automotive Lamp suppliers,Led Headlight solutions,
[description] => IV Auto Parts is a Automotive Lamp suppliers, provides Led Headlight solutions,Luz Led Para Moto price,Headlights For Car fittings.
[orderid] => 1
[isnav] => true
[checkinfo] => true
[url] => index.html
[child] => Array
(
)
)
[1] => Array
(
[id] => 2
[siteid] => 1
[parentid] => 0
[parentstr] => 0,
[infotype] => 0
[classname] => About Us
[navname] => About Us
[alias] =>
[english] => We Make Fence Idea
[linkurl] => about.php
[relinkurl] => about.html
[picurl] =>
[picwidth] =>
[picheight] =>
[colorval] =>
[boldval] =>
[seotitle] => Car Head Lamp Agencies,vehicle Headlamp Wholesale,car Head Lamp Price; IV Auto P
[keywords] => car head lamp agencies,vehicle headlamp wholesale,
[description] => IV Auto Parts, built in China and based in mainland China YiWu, has specialized 2
[isnav] => true
[checkinfo] => true
[url] => about.html
[child] => Array
(
[0] => Array
(
[id] => 10
[siteid] => 1
[parentid] => 2
[parentstr] => 0,2,
[infotype] => 0
[classname] => Our Culture
[navname] => Our Culture
[alias] =>
[english] =>
[linkurl] => about.php?cid=10
[relinkurl] => about-10-1.html
[picurl] =>
[picwidth] =>
[picheight] =>
[colorval] =>
[boldval] =>
[seotitle] =>
[keywords] =>
[description] =>
[orderid] => 10
[isnav] => true
[checkinfo] => true
[url] => about-10-1.html
[child] => Array
(
)
)
[1] => Array
(
[id] => 11
[siteid] => 1
[parentid] => 2
[parentstr] => 0,2,
[infotype] => 2
[classname] => Our Team
[navname] => Our Team
[alias] =>
[english] =>
[linkurl] => team.php
[relinkurl] => team.html
[picurl] =>
[picwidth] =>
[picheight] =>
[colorval] =>
[boldval] =>
[seotitle] =>
[keywords] =>
[description] =>
We have been supplying Replacement Headlight assembly,Side Light,Tail Lights,driving Lights,Led Fog,Interior Light,Light Accessories,since 2009, and thanks to the contribution of our professional team, customers across the world thumb up to IV Aut [orderid] => 11 [isnav] => true [checkinfo] => true [url] => team.html [child] => Array ( ) ) [2] => Array ( [id] => 12 [siteid] => 1 [parentid] => 2 [parentstr] => 0,2, [infotype] => 0 [classname] => Reference List [navname] => Reference List [alias] => [english] => [linkurl] => reference.php [relinkurl] => reference.html [picurl] => [picwidth] => [picheight] => [colorval] => [boldval] => [seotitle] => [keywords] => [description] => [orderid] => 12 [isnav] => true [checkinfo] => true [url] => reference.html [child] => Array ( ) ) ) ) [2] => Array ( [id] => 3 [siteid] => 1 [parentid] => 0 [parentstr] => 0, [infotype] => 2 [classname] => Warranty [navname] => Warranty [alias] => [english] => [linkurl] => warranty.php [relinkurl] => warranty.html [picurl] => [picwidth] => [picheight] => [colorval] => [boldval] => [seotitle] => Halogen Headlamps Solution,Motorcycle Headlamp Services,Upgrade Headlight Cost; [keywords] => Halogen Headlamps Solution,Motorcycle Headlamp Ser [description] => IV Auto Parts Provided For You Halogen Headlamps Solution,Motorcycle Headlamp Services,Upgrade Headlight Cost Calculate.
[orderid] => 3 [isnav] => true [checkinfo] => true [url] => warranty.html [child] => Array ( [0] => Array ( [id] => 13 [siteid] => 1 [parentid] => 3 [parentstr] => 0,3, [infotype] => 2 [classname] => CERTIFICATES [navname] => CERTIFICATES [alias] => [english] => [linkurl] => warranty.php?cid=13 [relinkurl] => warranty-13-1.html [picurl] => [picwidth] => [picheight] => [colorval] => [boldval] => [seotitle] => [keywords] => [description] => Your partner all the way
At IV Auto Parts we work as a complete supplier: We develop, produce and sell finishing systems and make sure the operators are fully instructed and able to run the Parts.
On top of tha [orderid] => 13 [isnav] => true [checkinfo] => true [url] => warranty-13-1.html [child] => Array ( ) ) [1] => Array ( [id] => 34 [siteid] => 1 [parentid] => 3 [parentstr] => 0,3, [infotype] => 0 [classname] => FAQ [navname] => FAQ [alias] => [english] => [linkurl] => FAQ.php [relinkurl] => FAQ.html [picurl] => [picwidth] => [picheight] => [colorval] => [boldval] => [seotitle] => [keywords] => [description] => [orderid] => 28 [isnav] => true [checkinfo] => true [url] => FAQ.html [child] => Array ( ) ) [2] => Array ( [id] => 33 [siteid] => 1 [parentid] => 3 [parentstr] => 0,3, [infotype] => 0 [classname] => Service & After Sales [navname] => Service & After Sale [alias] => [english] => [linkurl] => ServiceAndAfterSales.php [relinkurl] => ServiceAndAfterSales.html [picurl] => [picwidth] => [picheight] => [colorval] => [boldval] => [seotitle] => [keywords] => [description] => [orderid] => 29 [isnav] => true [checkinfo] => true [url] => ServiceAndAfterSales.html [child] => Array ( ) ) ) ) [3] => Array ( [id] => 4 [siteid] => 1 [parentid] => 0 [parentstr] => 0, [infotype] => 2 [classname] => Products [navname] => Products [alias] => Products List [english] => Explore Auto Parts Products [linkurl] => products.php [relinkurl] => products.html [picurl] => [picwidth] => [picheight] => [colorval] => [boldval] => [seotitle] => Headlamp Car For Sale,buy Headlamp,refit Headlight Cost, Head Lamp Fittings; IV [keywords] => IV Auto Parts Provide You With Details Refit Buy [description] => IV Auto Parts Provide You With Details Refit Buy Headlight Cost,head Lamp Fittings For Sale.
[orderid] => 4 [isnav] => true [checkinfo] => true [url] => products.html [child] => Array ( [0] => Array ( [id] => 24 [siteid] => 1 [parentid] => 4 [parentstr] => 0,4, [infotype] => 2 [classname] => Headlight assembly [navname] => Headlight assembly [alias] => Headlight assembly [english] => Headlight assembly [linkurl] => products-24-1.html [relinkurl] => products-24-1.html [picurl] => [picwidth] => [picheight] => [colorval] => [boldval] => [seotitle] => [keywords] => [description] => [orderid] => 22 [isnav] => true [checkinfo] => true [url] => products-24-1.html [child] => Array ( ) ) [1] => Array ( [id] => 29 [siteid] => 1 [parentid] => 4 [parentstr] => 0,4, [infotype] => 2 [classname] => Taillight Assembly [navname] => Taillight Assembly [alias] => Taillight Assembly [english] => Taillight Assembly [linkurl] => [relinkurl] => products-29-1.html [picurl] => [picwidth] => [picheight] => [colorval] => [boldval] => [seotitle] => Taillight Assembly [keywords] => Taillight Assembly,Tail Lights,Tail Lamp,Led Tail [description] => Taillight Assembly,Tail Lamp,Led Tail Lights For Audi [orderid] => 23 [isnav] => true [checkinfo] => true [url] => products-29-1.html [child] => Array ( ) ) [2] => Array ( [id] => 25 [siteid] => 1 [parentid] => 4 [parentstr] => 0,4, [infotype] => 2 [classname] => Turn Signal Light [navname] => Turn Signal Light [alias] => Turn Signal Light [english] => Turn Signal Light [linkurl] => products-25-1.php [relinkurl] => products-25-1.html [picurl] => [picwidth] => [picheight] => [colorval] => [boldval] => [seotitle] => [keywords] => Turn Signal Light,Side Blinker,Audi Turn Signal Li [description] => Audi Turn Signal Light [orderid] => 24 [isnav] => true [checkinfo] => true [url] => products-25-1.html [child] => Array ( ) ) [3] => Array ( [id] => 36 [siteid] => 1 [parentid] => 4 [parentstr] => 0,4, [infotype] => 2 [classname] => Alternator [navname] => Alternator [alias] => Alternator [english] => Alternator [linkurl] => products-36-1.php [relinkurl] => products-36-1.html [picurl] => [picwidth] => [picheight] => [colorval] => [boldval] => [seotitle] => Alternator For with Audi [keywords] => Alternator For with Audi [description] =>
Email:
sales@ivautoparts.com
Tel.: +86 13933893619

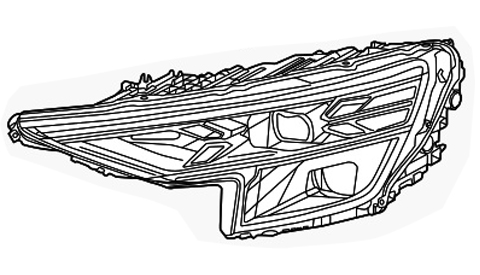
Can you clean the inside of a headlight assembly?
2026-09-29
Summary:
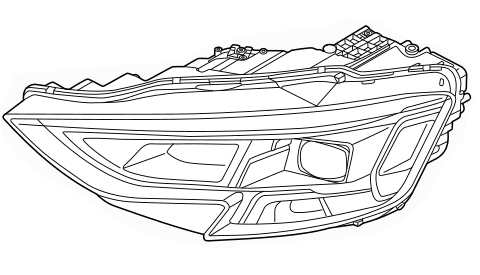
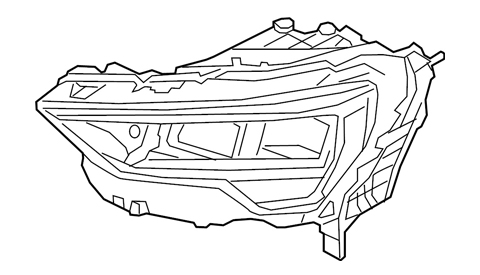
Can clean the inside of a headlight assembly, but it requires removing the headlight and separating the lens from the housing — it is not a simple exterior wipe-down.
Can clean the inside of a headlight assembly, but it requires removing the headlight and separating the lens from the housing — it is not a simple exterior wipe-down.
Here is what you need to know:
When it is worth doing
Cleaning the inside makes sense if you see dust, oil film, water stains, or condensation inside the lens. This is fairly common on older sealed units. If the inside is only lightly dusty and the light output is fine, it may be better to leave it alone, because repeated disassembly can weaken the seal.
How it is usually cleaned
Remove the headlight assembly from the car.
Heat the seal around the lens carefully so the adhesive softens.
Separate the lens from the housing without cracking it.
Wipe the inside with a soft microfiber cloth and a mild, non-abrasive cleaner. Avoid harsh solvents that can damage reflectors or plastic lenses.
Dry it completely, then reseal the lens with proper headlight sealant.
Reinstall and check for leaks and correct beam pattern.
Do not spray cleaner directly into a sealed headlight.
Do not use abrasive pads, strong alcohol, or high-pressure air near delicate reflectors.
If there is standing water, mold, or electrical damage, cleaning alone may not be enough.
Resealing is critical; a poor seal will let moisture back in.
Notes for Audi models
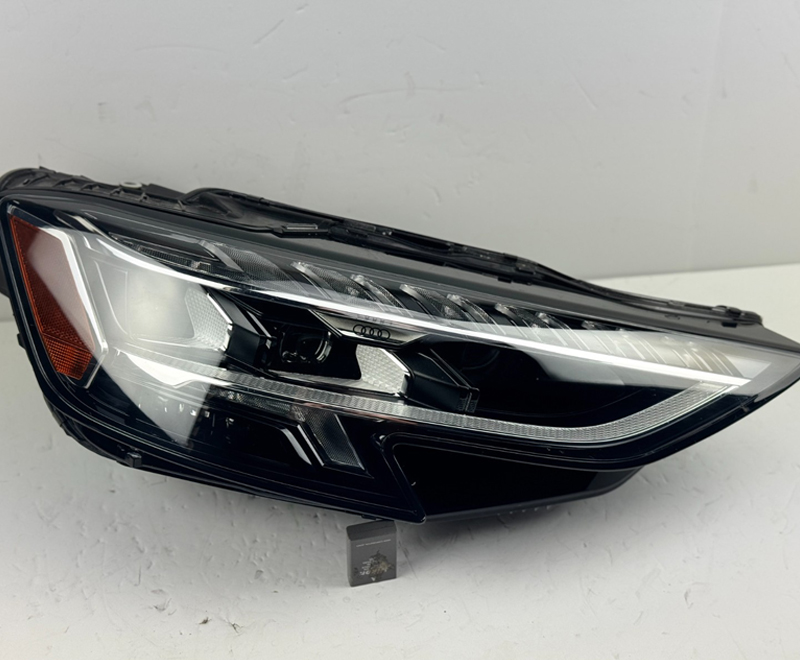
The same principle applies to audi tt headlights, audi a4 headlights, and audi a4 quattro headlights. Many Audi units use complex reflectors, projectors, HID/LED modules, and tight seals, so improper opening can cause fogging, misalignment, or water intrusion. For these cars, professional cleaning or replacement is often the safer choice, especially if the assembly is already leaking or internally damaged.
Here is what you need to know:
When it is worth doing
Cleaning the inside makes sense if you see dust, oil film, water stains, or condensation inside the lens. This is fairly common on older sealed units. If the inside is only lightly dusty and the light output is fine, it may be better to leave it alone, because repeated disassembly can weaken the seal.
How it is usually cleaned
Remove the headlight assembly from the car.
Heat the seal around the lens carefully so the adhesive softens.
Separate the lens from the housing without cracking it.
Wipe the inside with a soft microfiber cloth and a mild, non-abrasive cleaner. Avoid harsh solvents that can damage reflectors or plastic lenses.
Dry it completely, then reseal the lens with proper headlight sealant.
Reinstall and check for leaks and correct beam pattern.
Do not spray cleaner directly into a sealed headlight.
Do not use abrasive pads, strong alcohol, or high-pressure air near delicate reflectors.
If there is standing water, mold, or electrical damage, cleaning alone may not be enough.
Resealing is critical; a poor seal will let moisture back in.
Notes for Audi models
The same principle applies to audi tt headlights, audi a4 headlights, and audi a4 quattro headlights. Many Audi units use complex reflectors, projectors, HID/LED modules, and tight seals, so improper opening can cause fogging, misalignment, or water intrusion. For these cars, professional cleaning or replacement is often the safer choice, especially if the assembly is already leaking or internally damaged.
Next:
Next:None